How to single crochet decrease
There are two ways to crochet a decrease stitch. When working in the round, do the invisible decrease stitch for a smoother finish. When working on a piece where both the “right” and “wrong” sides of the piece will be visible, do the regular decrease stitch.
How to do a regular single crochet decrease (step-by-step with photos)
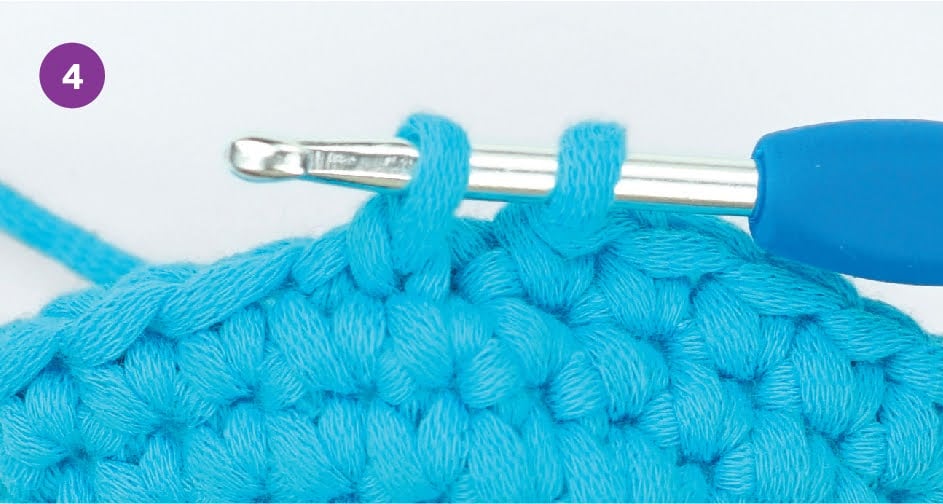
-v1684859604482.jpg) 1.Insert the hook under the top loops of the next stitch. 1.Insert the hook under the top loops of the next stitch. | -v1684859638649.jpg) 2. Yarn over. Pull the yarn through the stitch to draw up a loop. 2. Yarn over. Pull the yarn through the stitch to draw up a loop. | 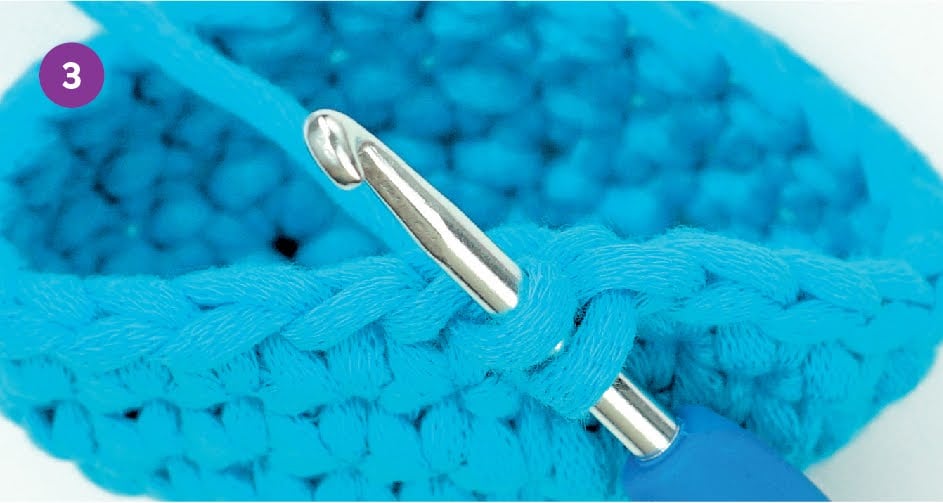 3. There should be two loops on the hook. 3. There should be two loops on the hook. | 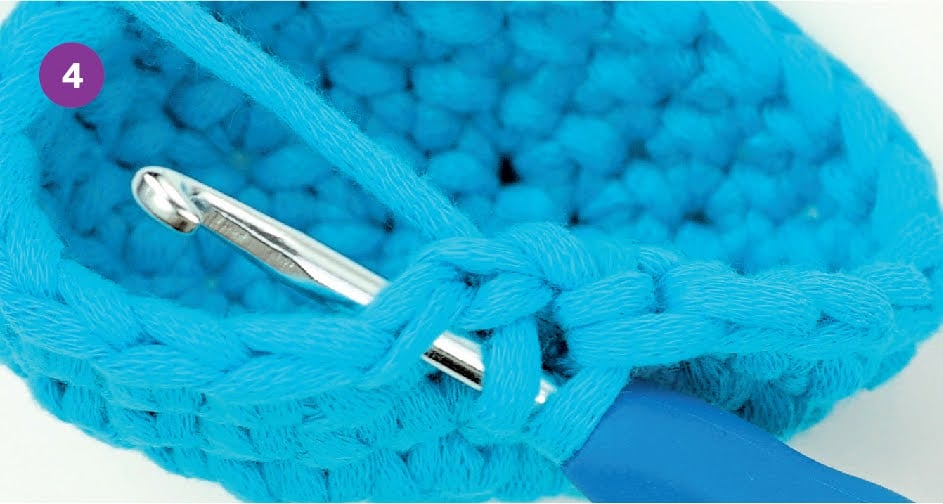 4. Insert the hook under the top loops of the next stitch. 4. Insert the hook under the top loops of the next stitch. |
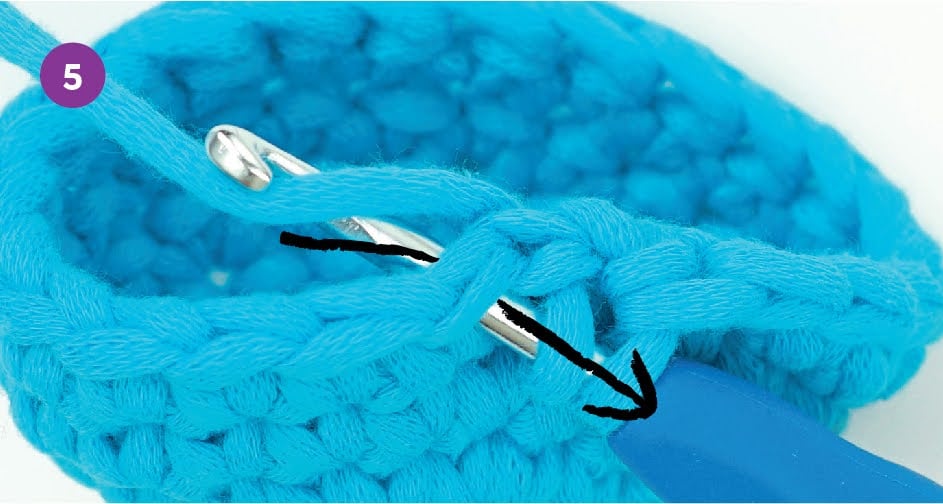 5. Yarn over. Pull the yarn through the stitch to draw up a loop. 5. Yarn over. Pull the yarn through the stitch to draw up a loop. | 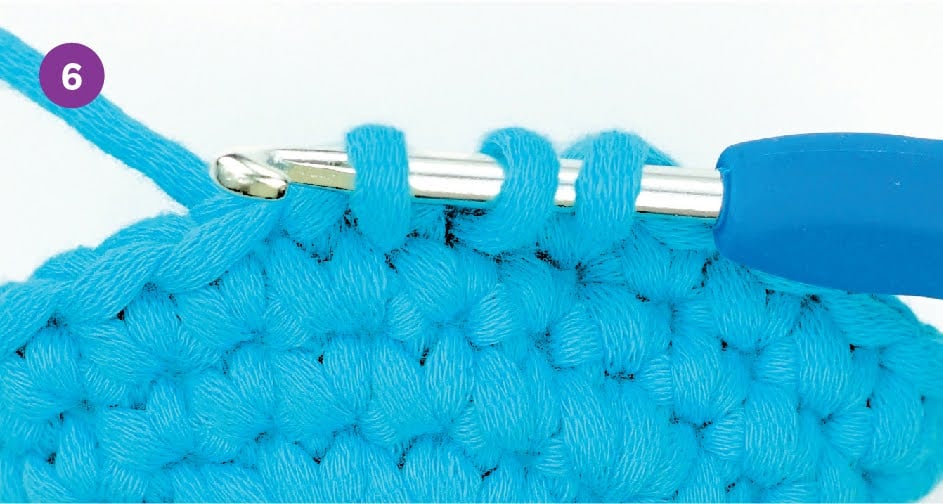 6. There should be three loops on the hook. 6. There should be three loops on the hook. | 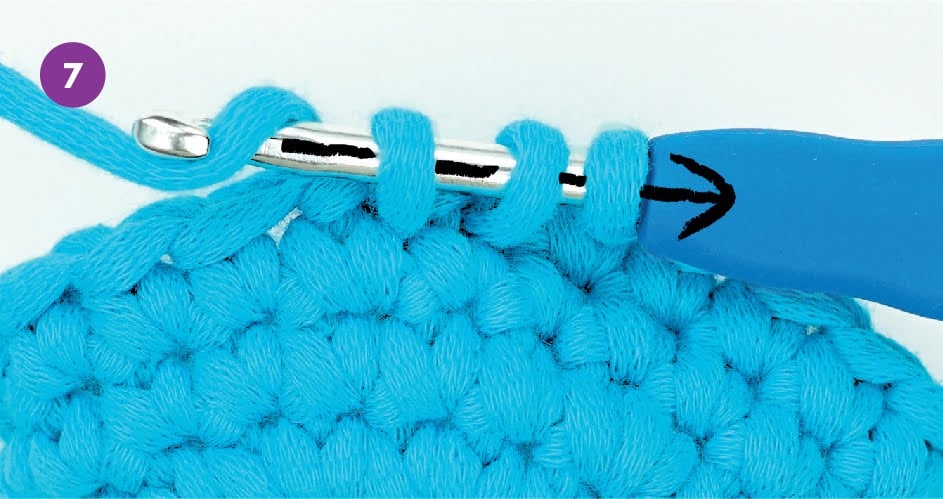 7. Yarn over. Pull the yarn through all three loops on the hook. There should be one loop left on the hook. 7. Yarn over. Pull the yarn through all three loops on the hook. There should be one loop left on the hook. |
How to do an invisible single crochet decrease (step-by-step with photos)
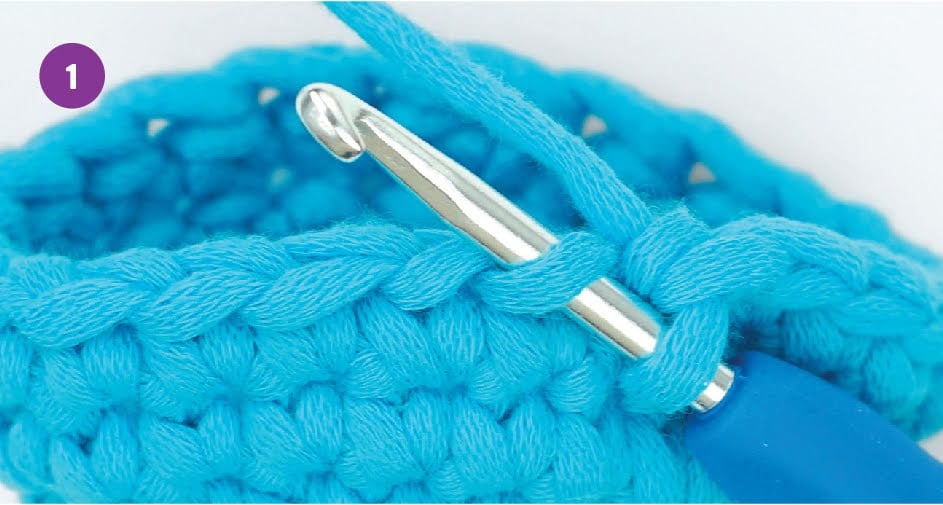 1. Insert the hook under the front loop of the next stitch 1. Insert the hook under the front loop of the next stitch | 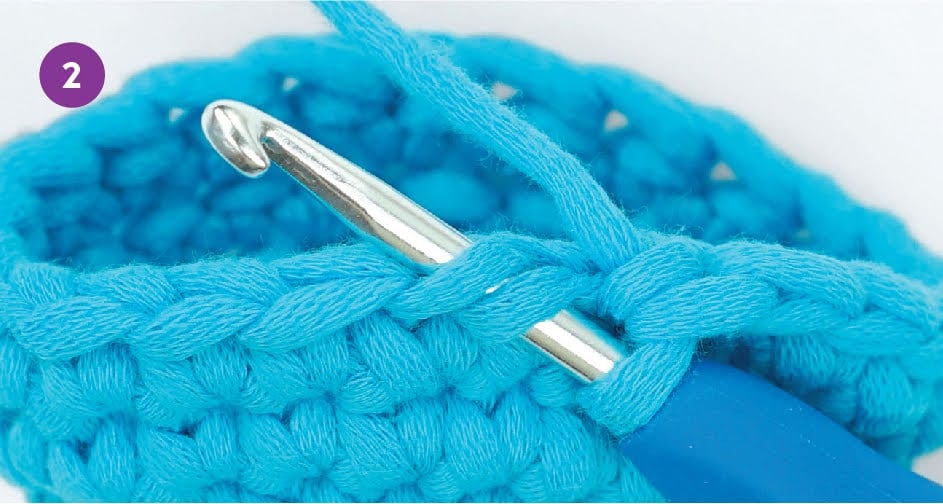 2. Insert the hook under front loop of the stitch after that. 2. Insert the hook under front loop of the stitch after that. | 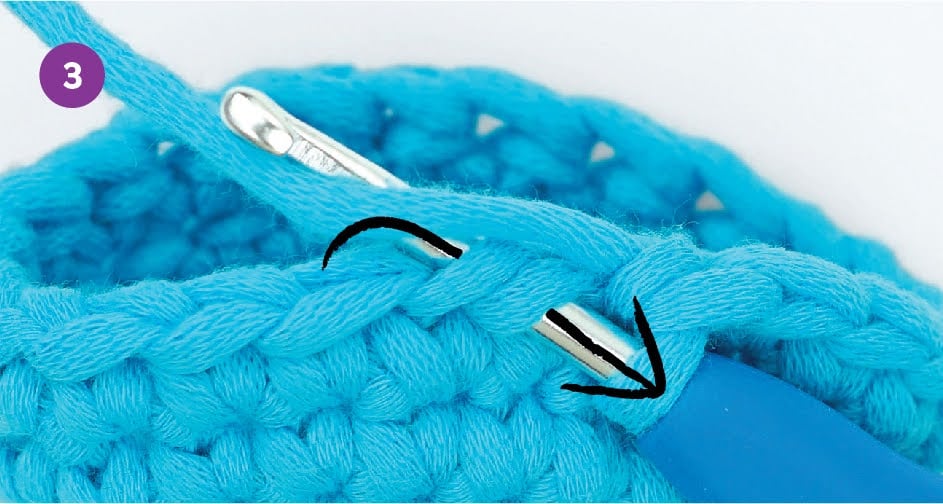 3. Yarn over. Pull the yarn through both front loops to draw up a loop. 3. Yarn over. Pull the yarn through both front loops to draw up a loop. |
 4. There should be two loops on the hook. 4. There should be two loops on the hook. | 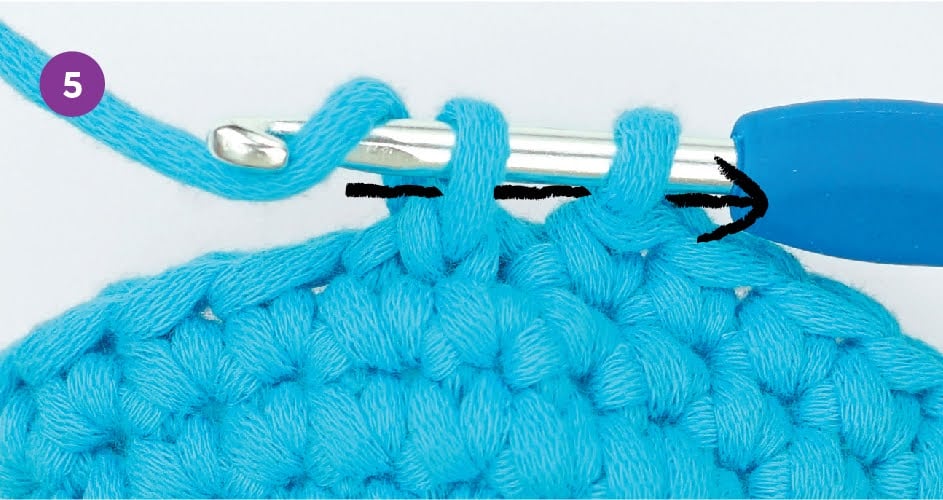 5. Yarn over. Pull the yarn through both loops on the hook. There should be one loop left on the hook. 5. Yarn over. Pull the yarn through both loops on the hook. There should be one loop left on the hook. |
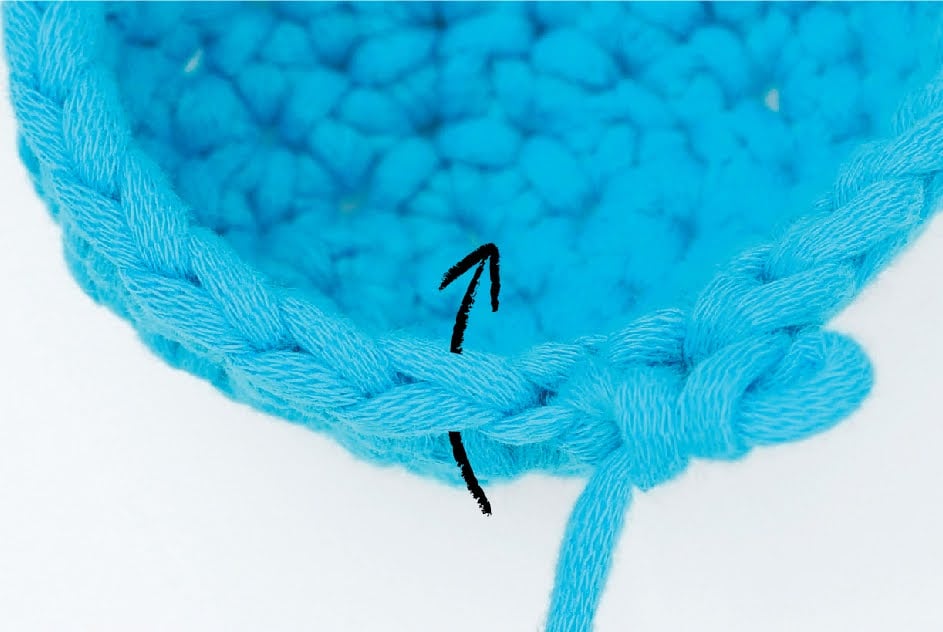
TIP
It can be tricky to see where to put the hook after a dec. The telltale sign is the front loop. If you see that the front loop of a stitch has been pulled, that’s part of the dec. The hook goes under the horizontal V next to that.
 |